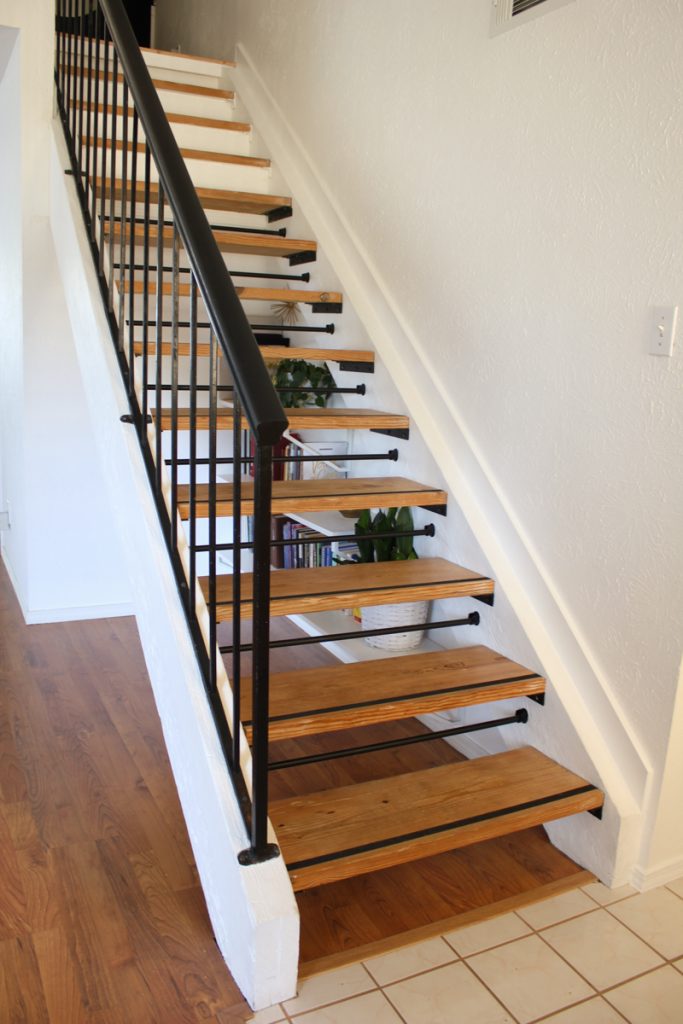
I completed this DIY Stair Renovation 5 years ago! I am very excited to chat with you today about how I removed the old carpet and completed this stunning staircase makeover. When we moved in 6 years ago the stairs were in bad shape. This project made a huge difference in the overall feel of our home. It is the first thing you see when you walk through the front door. When we bought our home the stair backing and sides were wrapped in a laminate. Our home was built in the early 80s, and other homes in our neighborhood actually have stairs that seem to be original and they are solely carpeted floating wood stairs. At some point, the previous owner added the wood laminate siding and backing to match the then-new flooring. The laminate backing to the treads might have been added for safety reasons as well.
I did this entire Reno project for $75!!
Getting Started
The very first step was to pull up a little bit of the carpet on the tread to confirm that the treads were in fact wood. From some tutorials I read, sometimes the treads are plywood, but they are usually at least pine. Pine is a softwood, but there are tons of homes built 100 years ago that still have functioning pine flooring. I knew that if it worked for them, there had to be a way for me to make this work without having to buy new stair treads.
Besides the aesthetic issues I had with everything going on, the stairs also were a huge dirt-trap. With the treads wrapped in carpet and also on the backboard, there was literally no way to keep it clean. The dirt would get trapped and then stay.
About 9 months into living here, I was done with leaving the stairs the way they were. It brought down the whole mood of the space. I started to look into the price for a renovation by professionals, and they were running in the $1000s so that was definitely out of the picture for us.
Tools
- Pliers (easiest way to remove staples)
- Pipe Cutter
- Hex Bit Socket Set
- Palm Sander
- Cordless Drill
- Impact Driver (Also an option instead of the drill, as it has more power to drive in the bolts.)
Materials:
- Metal Conduit Pipe
- Joint Compound
- Sealant Caulk
- Sand Paper
- Insulating Foam
- Wood Putty Stainable
- Anti Slip Tape
- Black Spray Paint Flat
- Stain, Golden Pecan
- One Coat Polyurethane
- Closet Rod Holders ( The ones I got are discontinued from IKEA, and seem smaller than these, but this may set you on the right track. You could also buy a wider metal conduit pipe to fit this holder.)
I completed this project with a very old drill and sander. Now that I have better tools, I see the value in making a small investment to get better tools will save so much time. But I had know idea at the time the difference it would make!
YouTube Video about the Process
1. Demo
The first thing to do was to pull off all the laminate. The demo wasn’t too extreme. It revealed that underneath the laminate there was solid wood on the sides. It was pretty bumpy but I didn’t mind the texture. I used some joint compound to smooth it out a little, and it still has a lot of texture but I think it adds some character to it.
2. Carpet Removal
After pulling off the laminate and the backing, it was time to focus on the individual steps. Once I purchased the correct sized hex bit to loosen the stair brackets, I removed the stair treads one by one and then painstakingly removed so many staples. It would have been a good idea to have this tool at the time, but mainly just used a flathead screwdriver. We ended up buying it when we removed the carpet upstairs for the DIY Plywood Flooring (full tutorial), and it made things so much easier. Having the right tools can have such a huge impact on a DIY project.
Another thing I was not expecting was the amount of dirt that was going to be involved in this project. Because it had been trapped for decades, it came billowing out. This part of the project would have definitely been best done outside.
The next step after the stairs were stripped down and the remaining dirt was cleaned off with lightly soapy rags, was to fill in the holes on the top of the treads with some wood putty. I did this to avoid the danger of splinters that an old staircase can bring.
3. Risers
I did run into the issue of the treads at the top part of the stairs. At the time, I was afraid that I would not be able to put the plywood risers back on if I removed them. So I sanded them while they were still attached and it was messy. I had a hard time cleaning up layers of sawdust for weeks after the project was done. It was a lot of work that could have been avoided. Oops. Lesson learned.
The plywood that was in place for the risers was cut poorly, but at the time being so new to DIY, I did not want to remove it, it felt too risky. So I used some foam to fill in the gaps, and it really worked perfectly to mask the imperfection and to make everything appear flush.
4. Stain & Seal:
First, I sanded the steps down using 150 grit sandpaper and a very old palm sender (this can be done also by hand or preferably with an orbital sander). I then used a couple of coats of stain to help the stairs come closest to the color of the flooring since I knew we wouldn’t be changing that anytime soon. I used a one-coat poly. and I have been very satisfied with the finish and it helped to speed up the whole process. This turned out to be a great way to give new life to the entire staircase without having to purchase new treads.
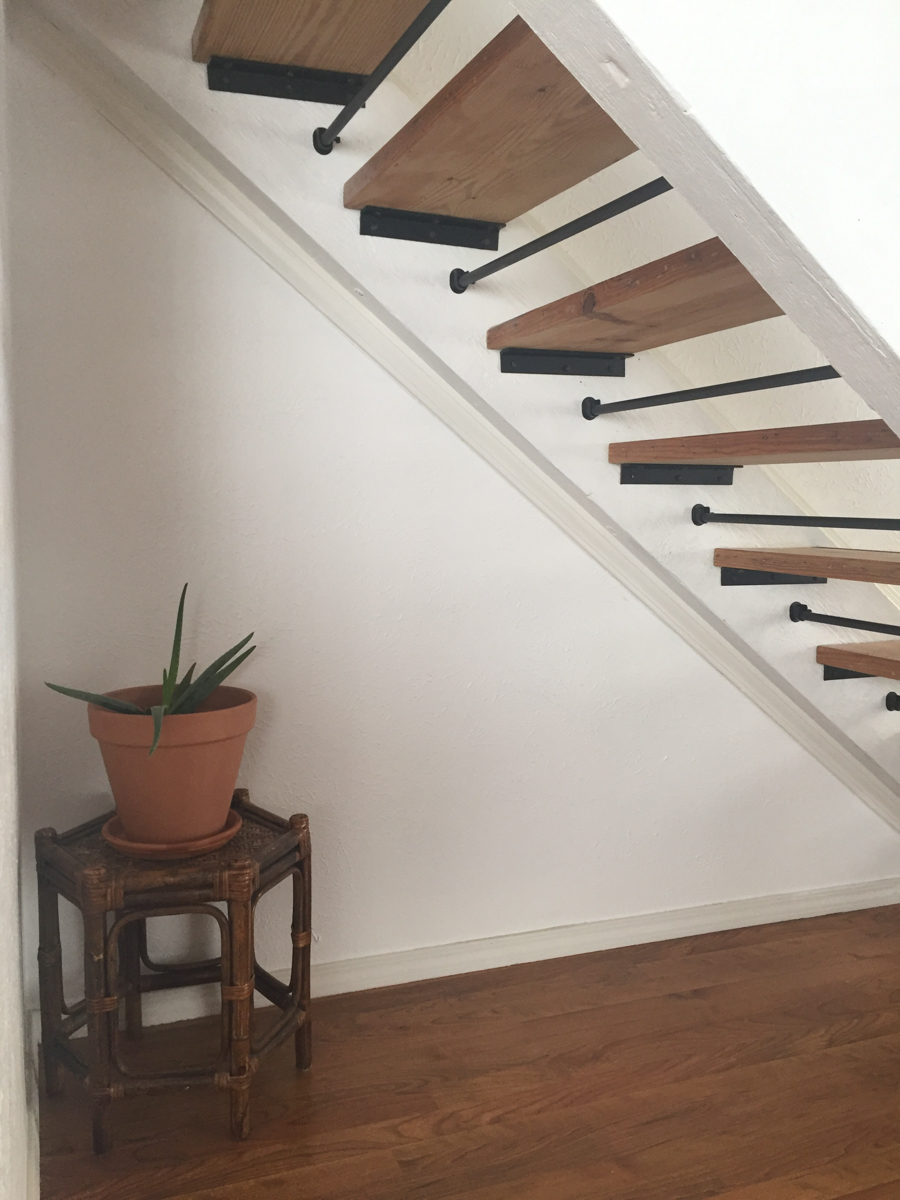
5. Safety Bars:
I spray-painted the existing stairs brackets with a matte black to match the iron balusters. However, I still needed a solution for the gaps in between each floating stair. We had a small child at the time and I wanted to make sure he would not fall through the gaps which was very possible. I needed to find the cheapest option that would match the modern and industrial feel I was going for. The best way to do this were these IKEA curtain rod brackets along with metal conduit pipes from the hardware store (Home Depot). The pricing of the pipes is a little under $3 for 8 feet. So affordable! We also bought a pipe cutter so we could easily measure and cut them. I spray-painted the pipes and brackets with the same matte black. I also bought a black stair safety strip. It is 80 grit so a little rough, but with the littles, I don’t want to chance anyone slipping down the stairs. The strip helps to give some grip to avoid more slips. This solution ended up working great and the best part is that it gives a fresh new look to the existing staircase tying together the old balusters with the spray-painted brackets.
The final part of this big project which was completed years later in 2020, was to take the banister railing outside and spray paint it satin black. It solidified the feel for me, just giving it that last bit of modern aesthetic.
Hard Work
This was a physically exhausting project, especially removing all the dirty old beige carpet. It took about 5 days of morning to late evening workb Since I had all the steps off at one point, which made it very difficult for us to access the upstairs part of the house, it was really important to move quickly. But I have to say personally it was a very fulfilling and empowering project, just mentally realizing I didn’t need $1,000s or even $100s of dollars to create an entirely different feel. And I think it was also a catalyst for understanding the power of paint. Paint can radically change your environment. Sometimes things loom large and seem impossible. But once I started to remove carpet from the wood treads, I knew I could complete this staircase renovation.
This whole project was a pivotal catalyst for realizing how empowering DIY can be. We have since changed the downstairs flooring, so now I need to decide if I want to re-stain the steps, install new stairs, or paint the existing ones. Small changes can go a long way and last a long time when it comes to improving the look of your home. It’s always an adventure in DIY renovations! I appreciate you joining me in learning about this DIY renovation, and I hope it can inspire you to Dwell Aware out there!
Disclaimer: This post may contain affiliate links, meaning I get a commission if you decide to make a purchase through my links, at no cost to you.


4 thoughts on “Budget DIY Staircase Remodel (step-by-step tutorial)”
I know you’ve learned a lot since you have done these but they are beautiful and this is so encouraging.
Thank you Christine, you so kind!
This is my first visit to your blog…I must say with all honesty, “I LOVE it”!!! ❤️ My family and I just recently moved into an old home n hilt in 1916, and I have been (inwardly) terrified of making needed and wanted renovations! We Have to diy as much as possible due to finances. Going though your post and just now your blog has given me a much needed shot of Courage and Inspiration to get off my keister, feel the fear, and get to diy-ing anyway!!! Thank You Dwellaware for sharing your process and progress with All of us…I want to do an action Today (any actionl to get the momentum going…Thanks again and Many Blessings to You and Your Family!!! Love your brand name by the way, very creative! 😁
Hi Lawanda, thank you so much for the kind words. Honestly, the reason I share my DIY projects is that others like you and me can feel encouraged and empowered to take on their designs and bring their vision to life. You’ve got this!!